
VIDEO
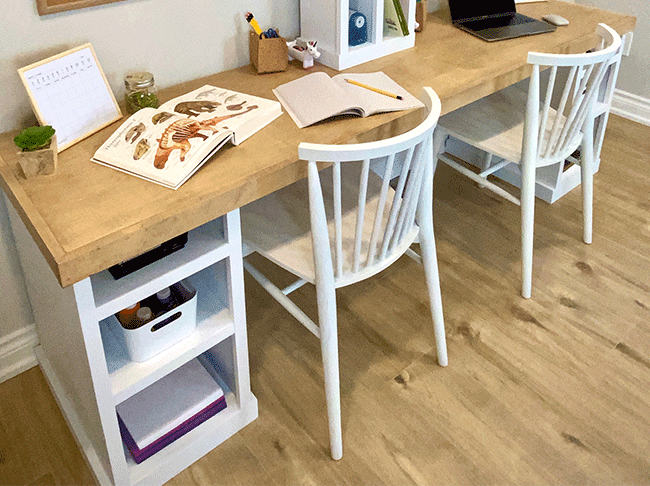
AFTER
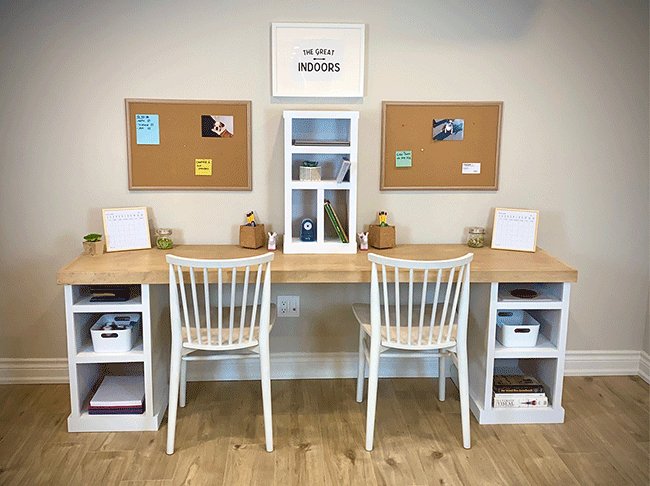
AFTER
Create the perfect home office or home school desk wide enough to easily accommodate 2 people along with all their office/school supplies. With the current trend of more and more businesses and schools turning to working/learning from home, what better way to give yourself a perfect work environment than building your own custom desk? The following plans make it very simple to alter the measurements to fit your own custom home office. Enjoy the build and, most importantly, have fun!
STEP ONE – Building the end cabinets:
Cut one plywood sheet into the following measurements for the end cabinets:
- Four (4) 27” x 20”
- Two (2) 27” x 12”
- Six (6) 19 ¼” x 12”
- Four (4) 12” x 2”
Assembling the cabinets - These are instructions to make one cabinet. Repeat to make the second one.
- Attach two 27” x 20” to the inner edges of one 27” x 12” using wood glue and brad nails from the back to form the cabinet box
- Insert two 12” x 2” strips across the bottom of the cabinet between the two sides to form the base. Attach using wood glue and brad nails.
- Insert shelves starting with the lower one on top of the two strips. Then insert additional shelves at desired heights and attach with wood glue and brad nails from the outside. THERE IS NO TOP SHELF. The top is open and the tabletop will close the cabinet top off.
Attaching the face frame - Cut and rip one of the 8’ x 3” strips into
- Two (2) 25” x 1 ½” strips
- Two (2) 12” x 1½” strips
- Two (2) 20” x 2 ½” strips
- One (1) 13 ½” x 2 ½” strip
- Using wood glue and brad nails, frame the face of the cabinet using the correct lengths of wood. The wider strips form the face around the bottom of the cabinet while the thinner strips face the shelves and sides.
- Fill all nail holes using VARATHANE Sandable Wood Filler following the instructions.
- Sand entire piece using 150 grit, then 220 grit.
- Spray with Painter’s Touch Flat White spray paint
STEP TWO – Cutting the support boards
This is the step where you can alter the length of the support beams determining how wide your desk will be. Cut three (3) 57” x 3” boards from the plywood. Drill 3 pocket holes at each end.
STEP THREE – Cutting the desktop
Using a sheet of plywood, cut the desktop: 7’ x 20” (adjustable for custom desk size). Using the 6’ strip of hardwood, cut 2 (two) 20” pieces. Using the 8’ strip of hardwood, cut 1 (one) 85 ½” piece.
STEP FOUR – Assembling the desk
Using the support boards, attach the two end cabinets together. Place the desktop on top of the attached cabinets. Attach 1 (one) 20” piece of hardwood strip to each end using wood glue and brad nails. Attach the 85 ½” long hardwood strip to the front of the desk using wood glue and brad nails. Use Varathane wood filler to plug all nail holes, and sand completely when dry. Attach tabletop to the support beams from under the table using several small “L” brackets.
STEP FIVE – Staining and Finishing
Use your Varathane stain of choice to stain the desktop. I used Flagstone. Follow the directions on the label. Finish the desktop with the Watco Wipe-On Poly – Satin. Follow the directions on the label.
OPTIONAL – Centre shelving unit for desktop
Cut plywood into the following dimensions:
2 (two) 25” x 7 ½” sides
1 (one) 25” x 10 ½” back
3 (three) 10 ½” x 6 ¾” shelves
1 (one) 10 ½” x 7 ½” top
Assemble unit using wood glue and brad nails. Shelves can be configured according to preference.
#We_Wood
Prepared by: The Stump Shop - Viktor Sarudi
Other Materials:
- Two (2) sheets of quality 8’ x 4’ plywood (I used maple)
- -One (1) 8’x 2” quality strip of hardwood (Use the same wood species as the plywood)
- One (1) 6’x 2” quality strip of hardwood (Use the same wood species as the plywood)
- Three (3) 8’ x 3” strips of wood (I used pine)
- 1 ¼” pocket hole screws
- 2” brad nails (and a nail gun)
- Assortment of sandpaper (150, 220 grit) (and a sander)
Discover More Projects
Locate a Rust-Oleum Retailer
