
Before
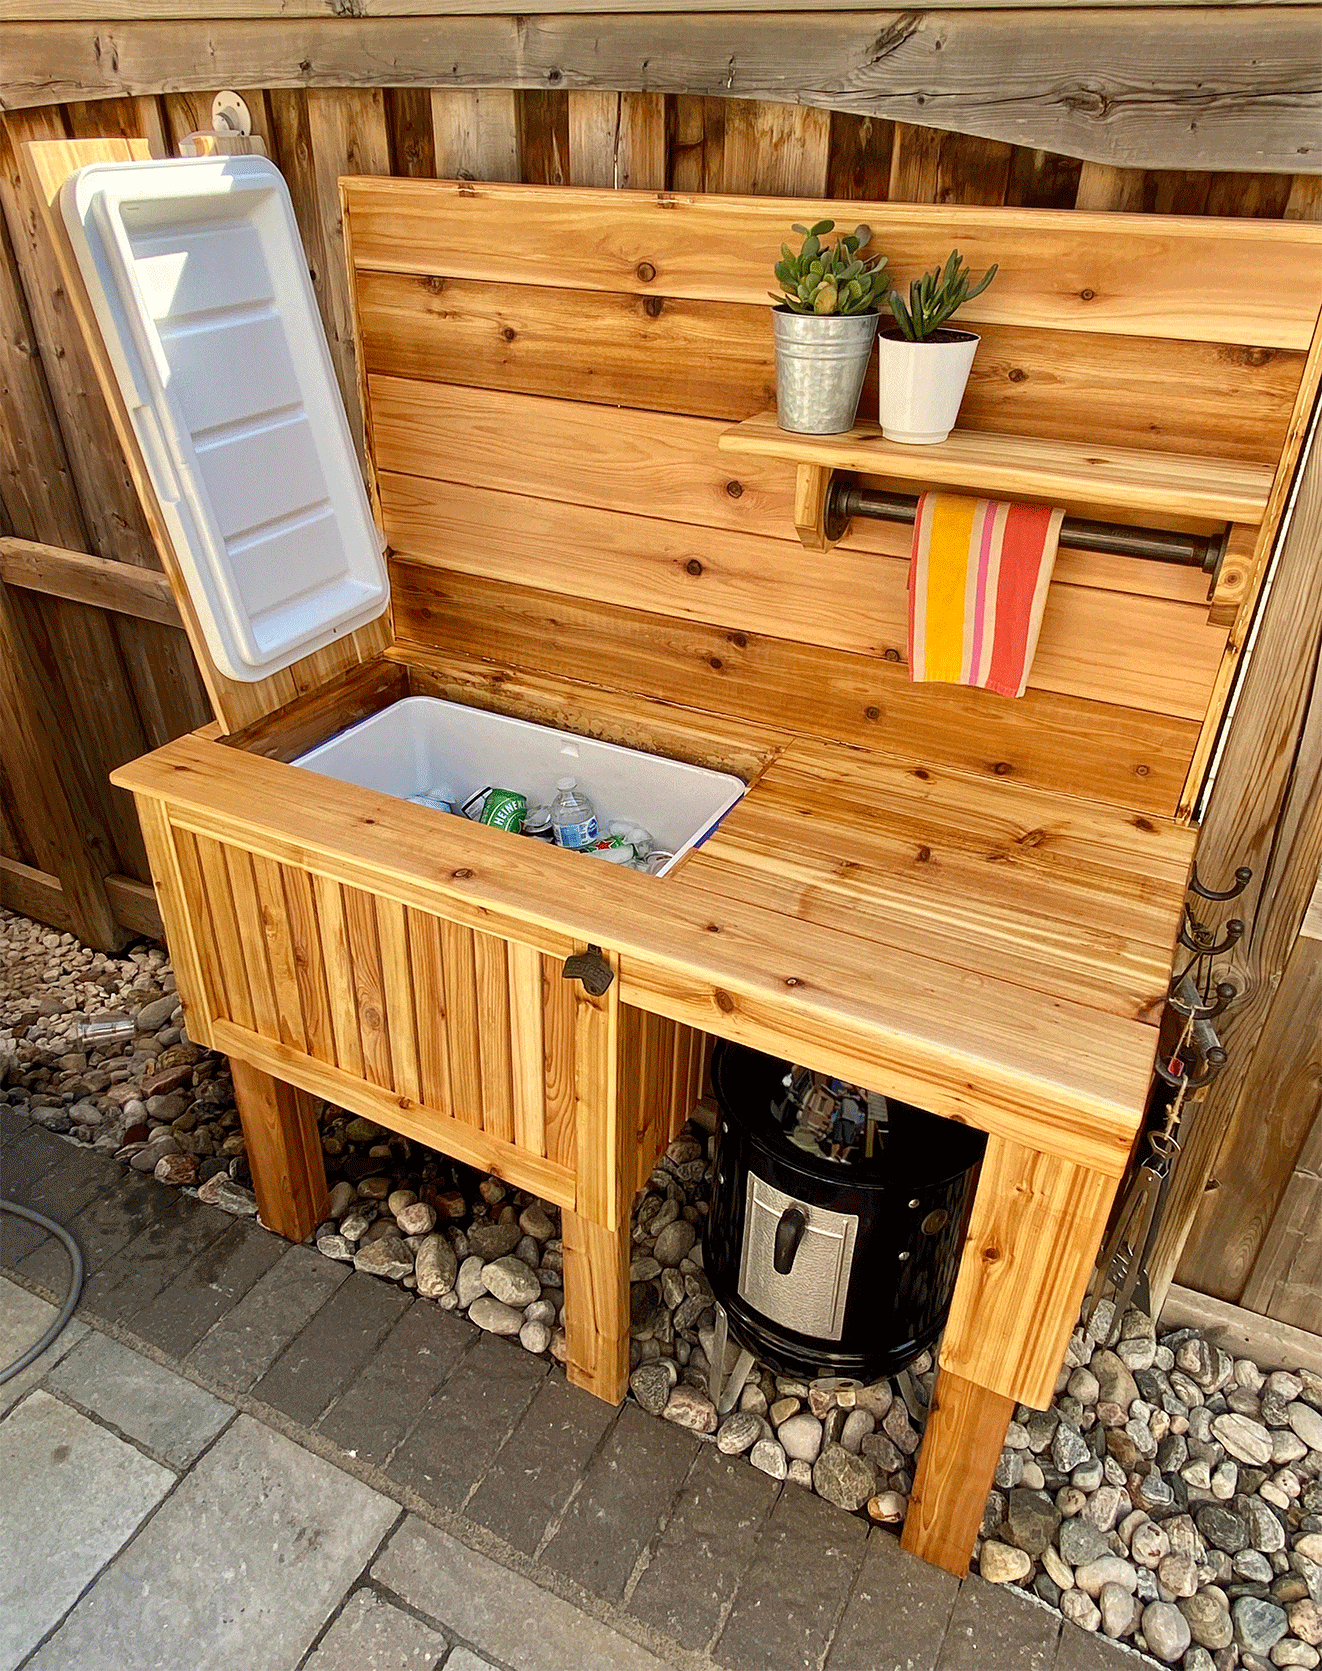
Since it’s time for summer BBQs, backyard fires and hanging out on the patio, wouldn’t it be nice to have an outdoor beverage station at the ready? This build includes an entire outdoor beverage station complete with a built-in cooler, bottle opener, tabletop and storage space for a smoker BBQ. Made from cedar wood and finished with a quality outdoor protectant, this beverage station is made to last for a long time.
NOTE:
The following build is specific to a Weber Smokey Mountain Smoker as well as a 26” cooler.
The measurements can be altered or customized to make this project even bigger or smaller to suit your own backyard needs.
STEP ONE
Making the Legs:
-Cut 4 pieces of 2x4 to 34” length
-Cut 2 pieces of 2x4 to 30.5” length
-Cut 2 pieces of 2x4 to 60” length
-Glue 2 of the 34” together to form 1 solid leg, and then repeat.
-Glue one 30.5” long piece to one 60” piece to form the rear legs and back support, and then repeat.
STEP TWO
Building the Frame:
-Cut 1 piece of 2x4 to 40” length
-Cut 1 piece of 2x4 to 47” length
-Cut 2 pieces of 2x4 to 15” length
-Using pocket hole joinery, join all the legs to the frame to form the overall base. Use the 47” piece as the rear support and the 40” as the front support. The shorter pieces are used as the side support.
NOTE: The following cuts are all dependent on the specific cooler and smoker you are building the table around.
-Cut an additional 2 pieces of 2x4 to 15” length as additional side support and attach 15” above the ground between the front and rear leg.
-Cut 2 pieces of 2x4 to 24” length
-Cut 1 piece of 2x4 to 15” length
-Cut 1 piece of 2x4 to 30.5” length
-Using the above pieces, form a box around the cooler and attach using wood screws.
-Reinforce the cooler from underneath using two 2x4 pieces cut to the length of your cooler and screwed into the surrounding frame, leaving the remaining space under the tabletop open for the smoker storage.
STEP THREE
Building the rear panel:
-Cut 5 pieces of 1x6 board to 50” length and attach them to the rear support using wood screws from the back (no visible screw holes).
STEP FOUR
Decorating with “skinny lap” to cover the cooler:
-Using the 1x6 boards, cut (rip) 32 - 1 ½” wide strips to 16” length.
-Using a nail gun and glue, attach the strips to the top and bottom of the frame using a spacer of ¼” between the pieces.
-Complete this around all sides of the cooler, as well as the opposite side, leaving the open space for the smoker storage.
STEP FIVE
Attaching the trim around the edges:
-Using the 1x6 boards, cut (rip) 2 ½” strips and cut into the following lengths:
1 x 48”
2 x 26”
6 x 17.5”
4 x 17”
2 x 23.5”
-Attach the 48” piece to the top of the rear wall with wood glue and nails.
-Attach the 26” pieces to the sides of the rear wall using wood glue and nails.
-Using the remaining strips, form a box around the edges of the skinny lap and attach using wood glue and nails.
STEP SIX
Attaching the tabletop:
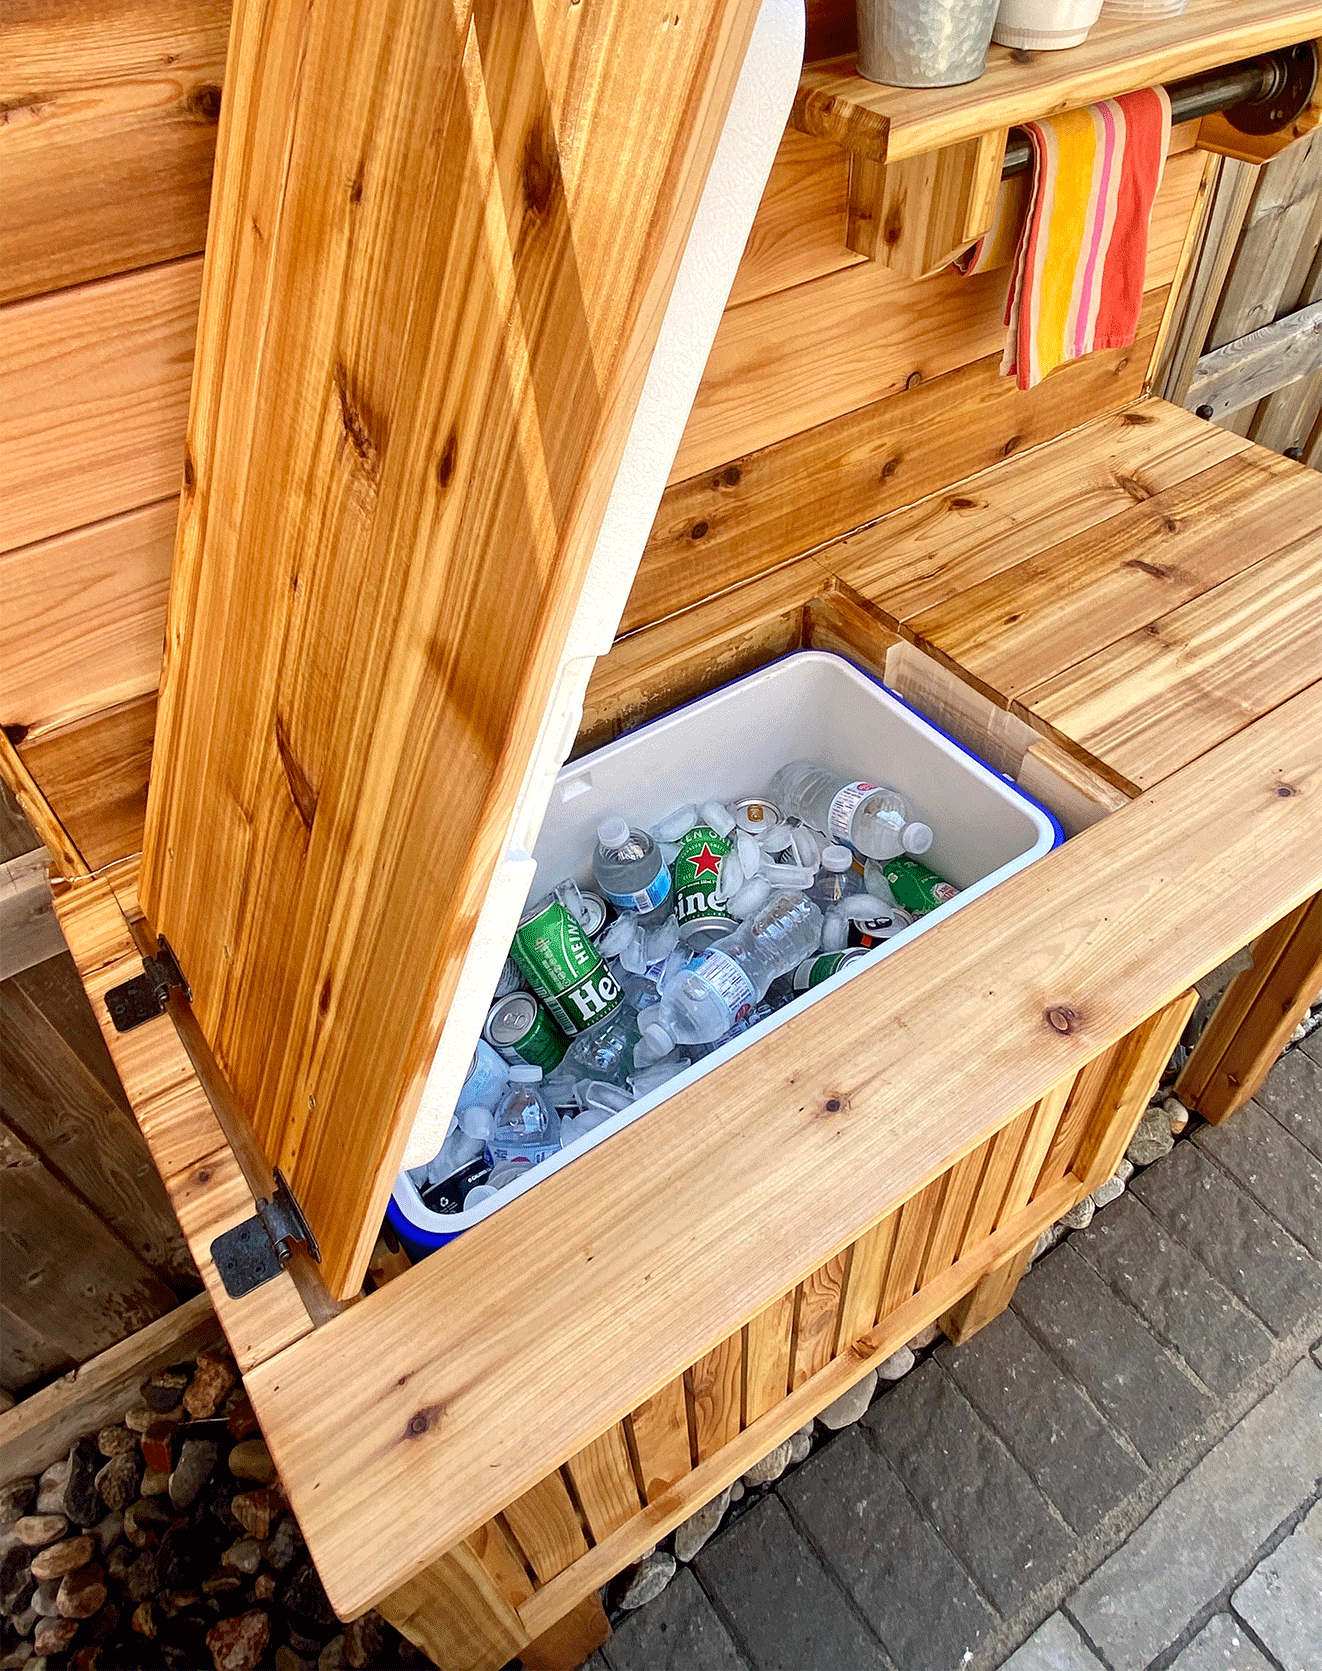
-Place the cooler into the box that you built and using several outdoor screws, screw through the bottom of the cooler into the support beams underneath to hold the cooler in place. Place the lid onto the cooler.
-Using the 1x6 boards, cut 4 boards to 50” length and place across the top of the supports to form the tabletop. Don’t attach until a hole has been cut for the cooler lid.
STEP SEVEN
Cutting the opening for the cooler:
-Based on the specific cooler size you are using, trace the lid onto the tabletop boards and cut out using a jigsaw. Also cut a finger hole to be used as a handle to open the cooler.
-Using outdoor screws and super glue, first super glue the boards to the cooler top then screw through the top to secure.
-Once the wood is attached to the cooler lid, place the lid back in place and attach the hinges to allow the cooler lid to open.
STEP EIGHT
Finishing the wood:
-Use the WATCO Tung Oil and apply to the entire table. Follow the directions on the label and do at least 3 applications.
- Once the final coat of WATCO Tung Oil has dried, apply the Varathane Premium Diamond Wood Finish. Follow the directions on the product label.
STEP NINE
Finishing touches:
-Use the TREMCLAD rust spray paint in Black to paint several outdoor screws. These screws will be used to attach the hardware of your choice.
-Spray all the hardware with the TREMCLAD Rust Paint in Clear Satin to ensure it is rust proof and weather resistant.
-Attach all the hardware (hooks, lights, bottle opener in your desired locations).
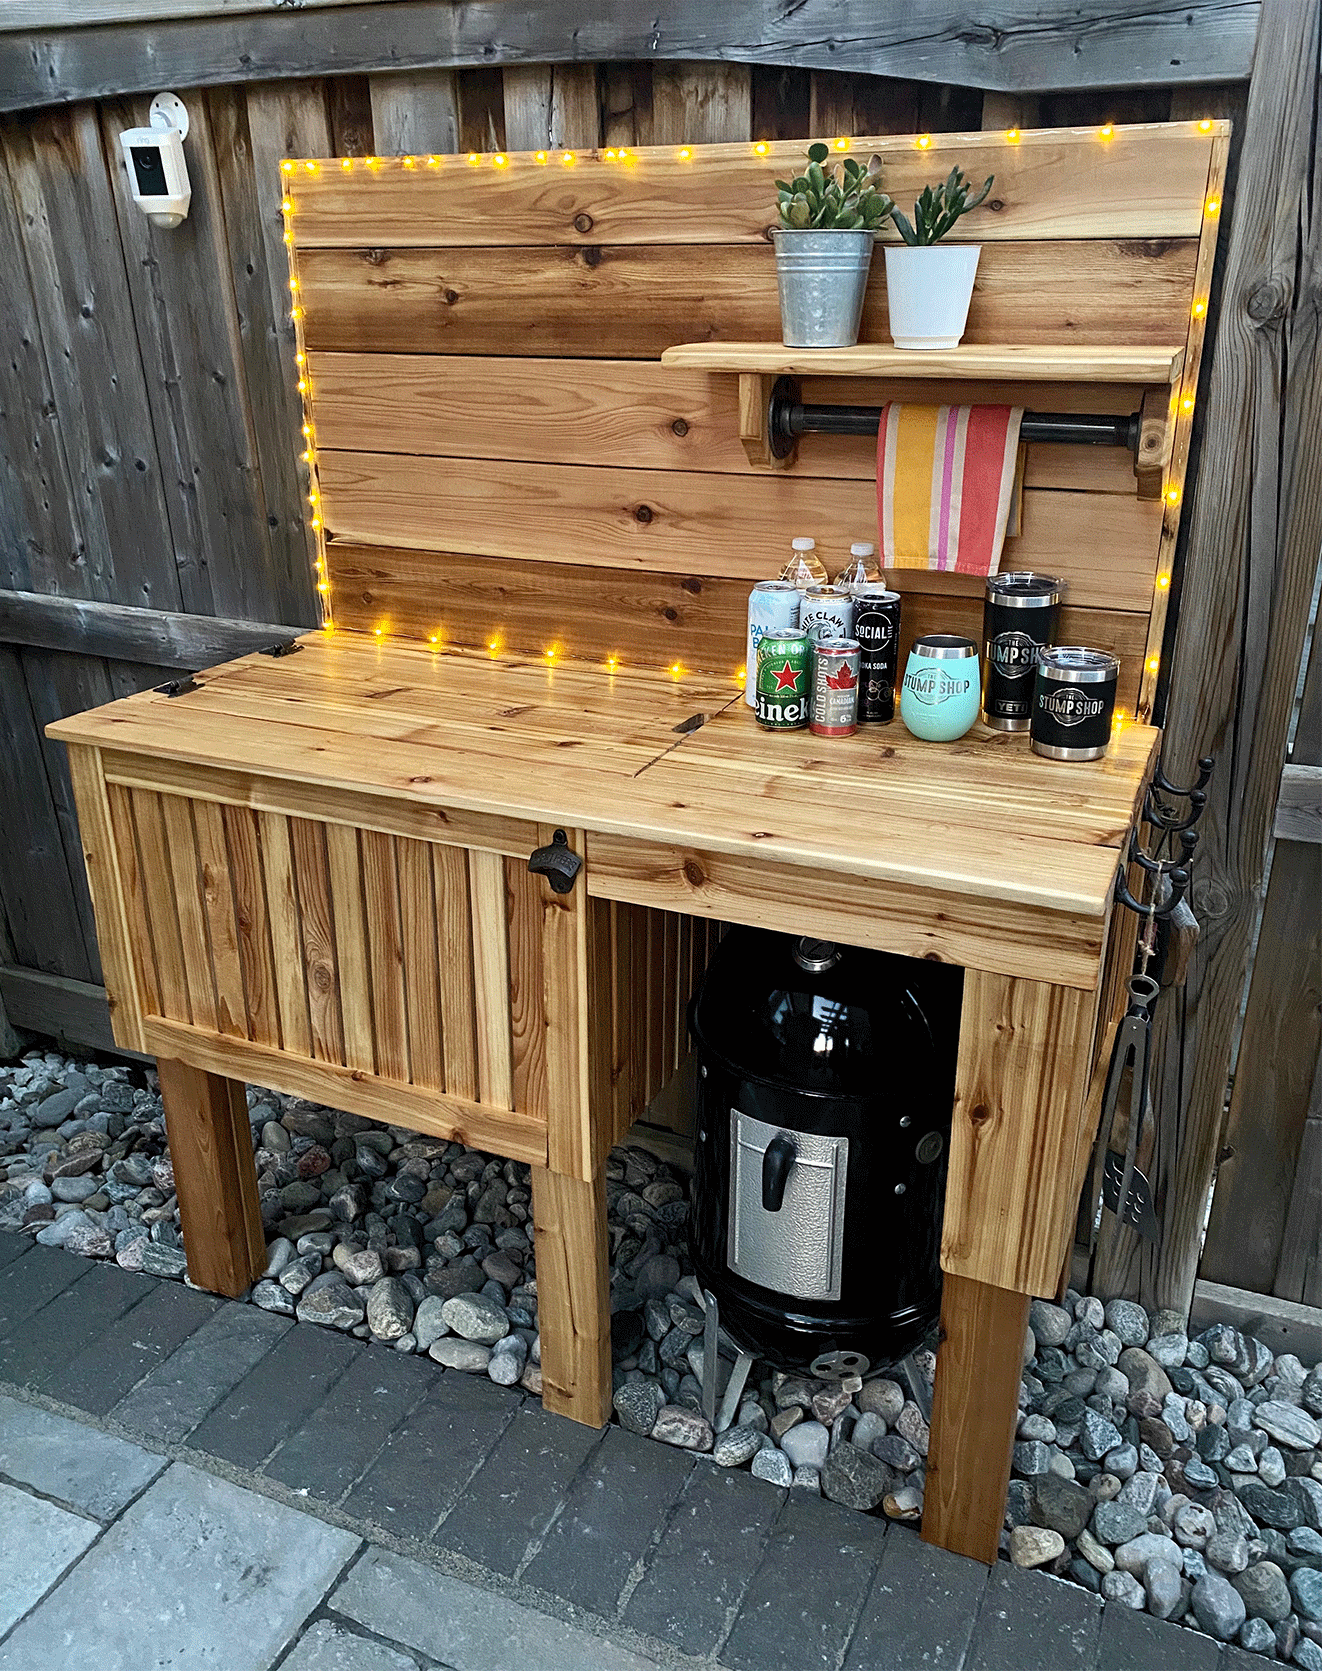
ENJOY!!!
Visit @RustOleumCa and @TheStumpShop for more tips and inspiration!
Prepared by:
The Stump Shop
Other Materials:
- 10 - 1” x 6” x8’ - Cedar Wood
- 8 - 2” x 4” x8’ - Cedar Wood
- Outdoor premium screws, assortment (2 ½”, 2”, 1 ½”)
- Pocket hole screws (2 ½”)
- Hinges for cooler lid
- Nails (preferably a nail gun)
- Super Glue
Discover More Projects
Locate a Rust-Oleum Retailer
