
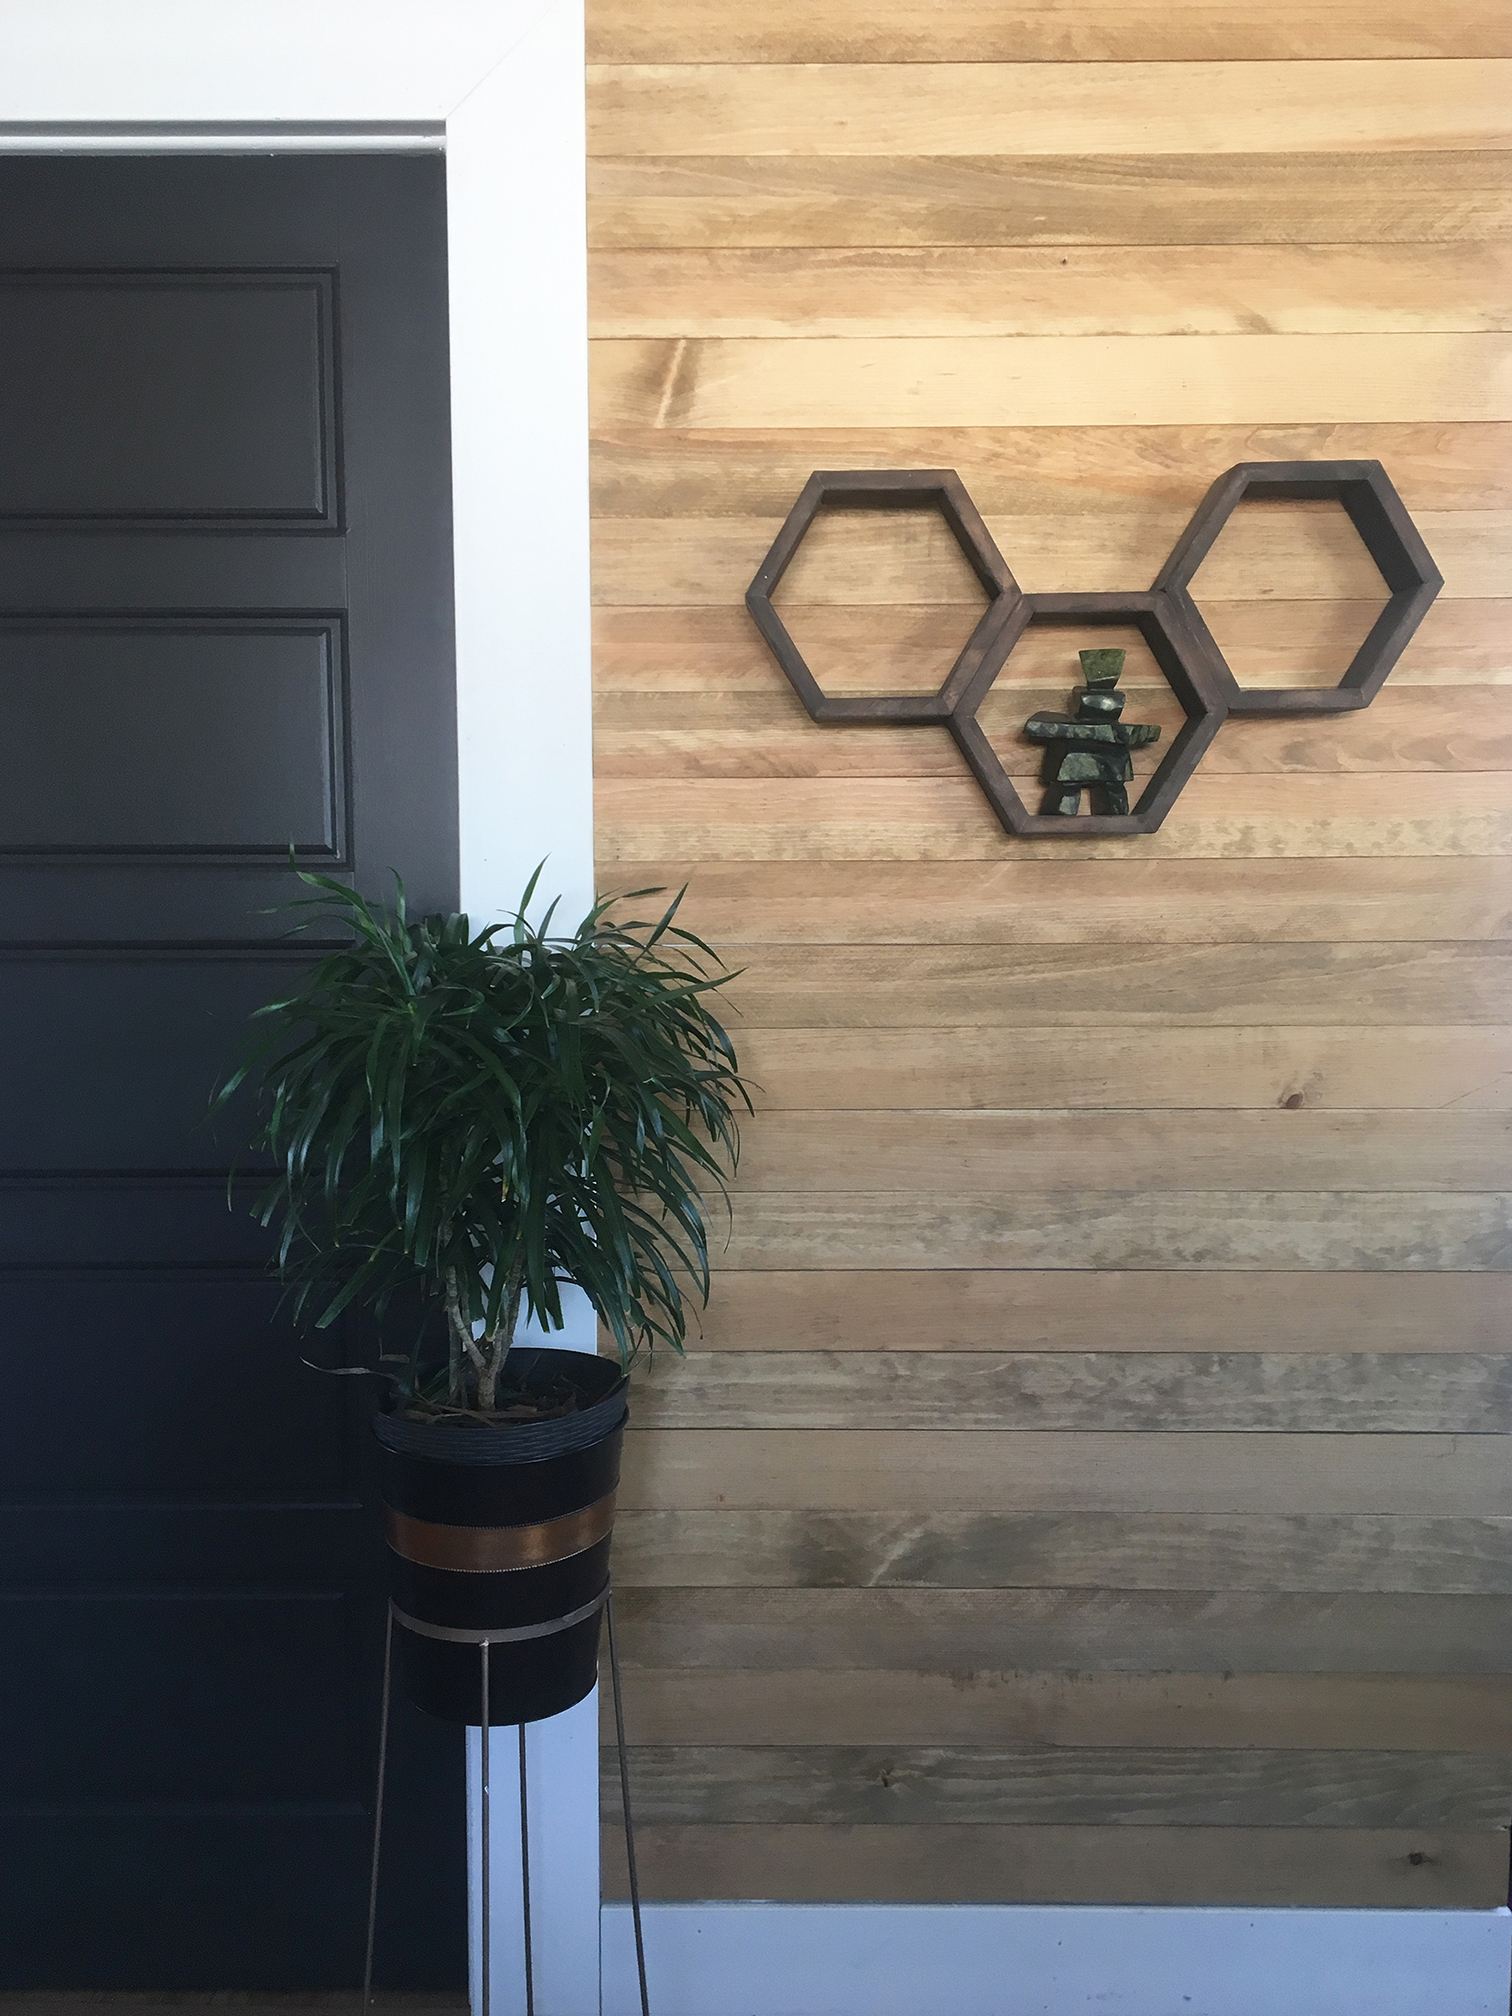
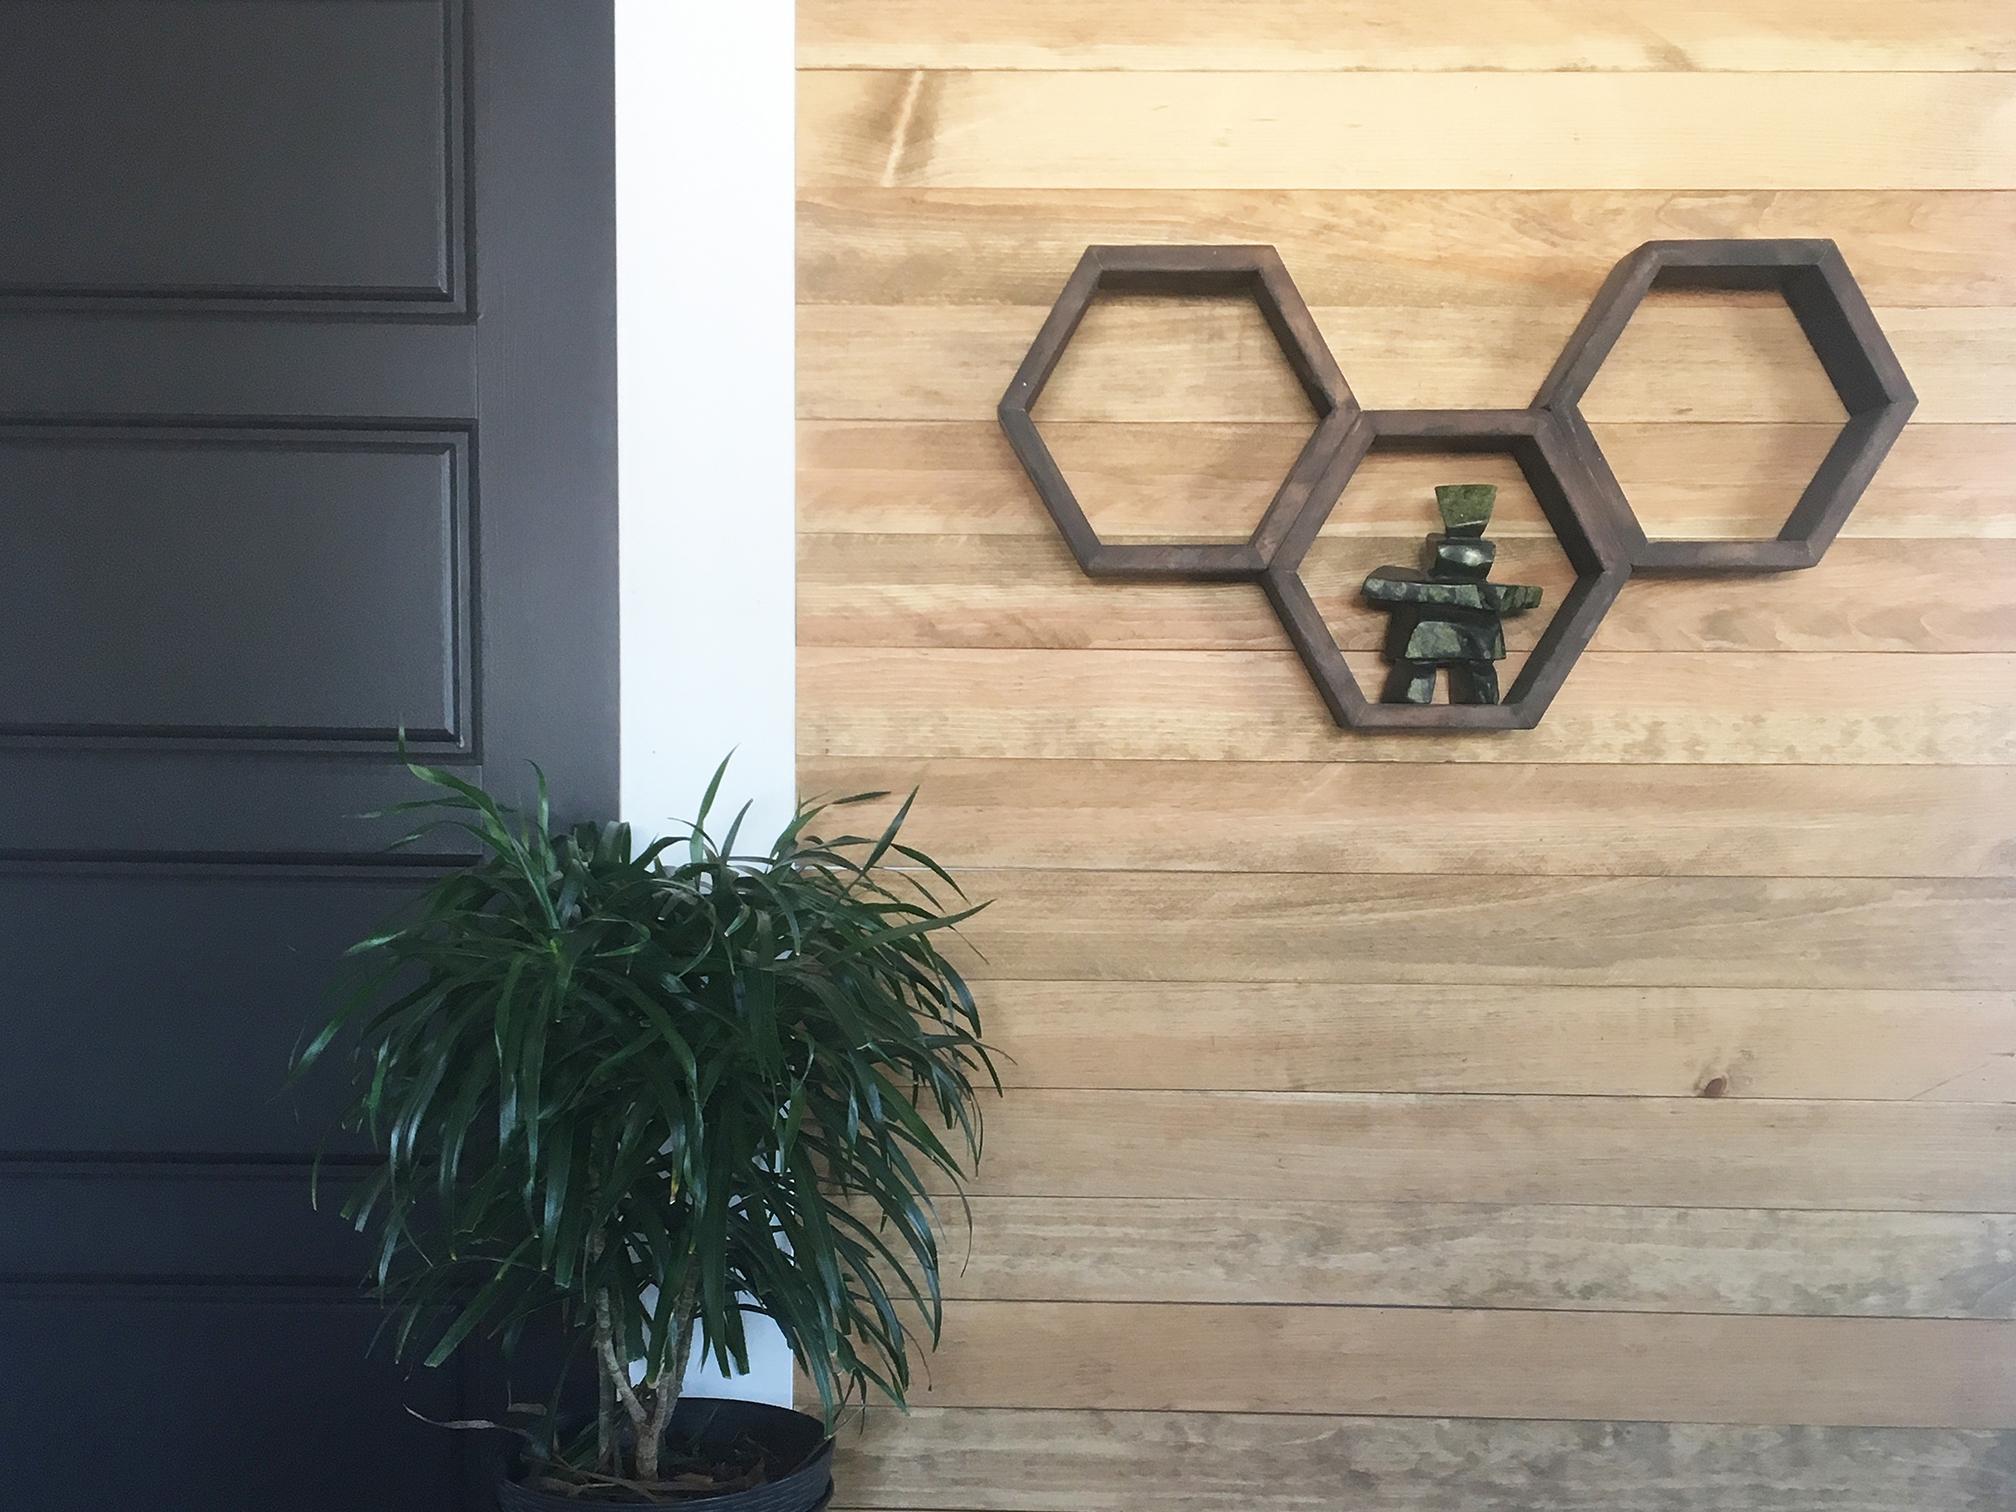
Before
Great for succulents, candles, books and more, these DIY hexagon shelves are the perfect addition to your home. Follow these step by Denika Coakley Woodworks to make your own!
Step 1: Select your wood. I like to use pine because it’s soft and easy to work with, but you could make these shelves out of any type.
Step 2: Rip your boards down on a table saw. My standard is 4” but you can make it any width. Some people like their shelves deeper so they can hold larger items.
Step 3: Using a mitre saw set at a 30-degree angle, cut six 6” pieces to make hexagon. If you’re planning to do an arrangement of hexagons, multiply the number of hexagons by six to figure out how many pieces you need in total. For example, if you want an arrangement of five hexagons, you’ll need 30 6” pieces.
Pro Tip: Most mitres have an automatic click-in at 32 degrees so be cautious that you don't bump your saw and accidentally cut at 32 degrees. Glance down every cut to confirm the saw angle is still set at 30 degrees.
Step 5: Sand each piece.
Step 6: Use PL premium or similar construction adhesive on one side of each piece, attach and pin nail together. Because they’re a butt joint (end to end), it doesn't leave much room for stability, so make sure you’re using strong glue.
Pro Tip: If you used larger nails or if the pin nail holes are noticeable, use Varathane Food Filler to fill in the marks.
Step 7: Once all pieces are assembled, arrange your hexagons however you like.
Follow step 6 to secure your arrangement together.
Step 8: Once the glue has dried, sand one final time.
Step 9: Apply Varathane Ultimate Wood Stain. Let dry for one hour
Step 10: Finish with Varathane Diamond Wood Finish - Interior.
Visit Rust-Oleum Canada and Denika Coakley Woodworks on Instagram for more tips and inspiration!
#We_Wood
Other Materials:
- Pine Board
- Respirator
- Safety Goggles
- Finishing Gun
- Pin Nails
- Table Saw
- Mitre Saw
- Construction Adhesive
Locate a Rust-Oleum Retailer
